Upload Page
Use the Upload page to view previously uploaded files and to upload additional files.
View previously uploaded files
Use the Upload page to view case files uploaded 24, 48, or 72 hours ago, or view a full seven days of uploads.

In addition, you can also view uploads with errors.
Upload files
- From the CaseReview Navigation Bar, click Upload.
-
On the Upload page, click Browse. Use the dialog box to navigate to the location the files are stored.

- At the stored location, highlight case(s) you wish to upload. Use the Shift key to select multiple cases.
- Click Open. The file(s) appear in the field.
- Click Upload.
-
The Upload page updates to show the status of each case (there is no need to refresh the page). There are three possible upload results:
-
Success: The file successfully uploaded. Click View case to open the Case Summary page.
-
Warning: Issues were found during the upload. Here are some examples of common warning messages:
-
Duplicate file, upload of this file was canceled.
No case was found to be a match for this audio file. It is possible a case will come later and it will be attached.
The case that matches this audio file already has an associated audio file. The upload file was ignored.

-
-
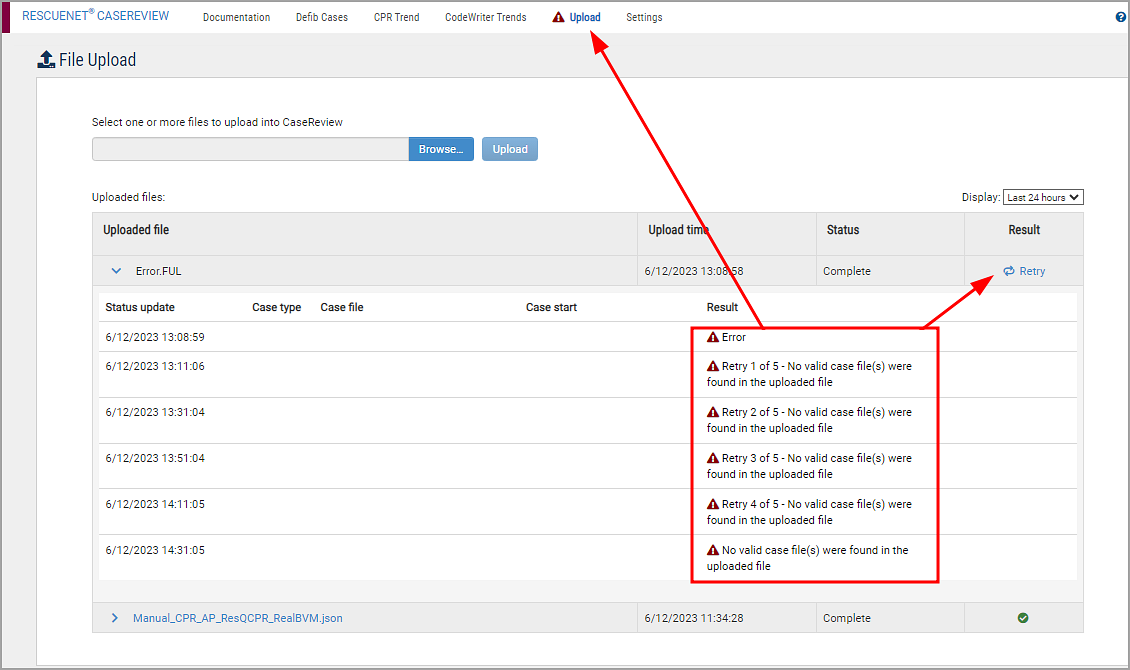
Error: A red triangle means that an error occurred that prevented the upload of the file. If the case failed to process within the last seven days, two things will happen: (1) a Retry link will display under the Result column, (2) an error icon will display by the Upload option on the navigation bar.
-
Expand the upload case to see more information about the upload:
-
To be consistent with the case start, the time fields are in a 24-hour format.
-
The "Status update" timestamp shows the time the case was processed.
-
Click the blue link or "View case" to go to Case Summary page.
-
When the file name is too long for the "Case filename" column, a '...' displays. Hover over the file name to see the full name.
If someone deletes a case file, the case will still display in the Upload page but the links to the case will no longer be active (grayed out).

If the system detects a non-supported file type, it will display an error.

The following message displays if a self-test was uploaded from an R Series. The system does not create/list a file name for self-test files.
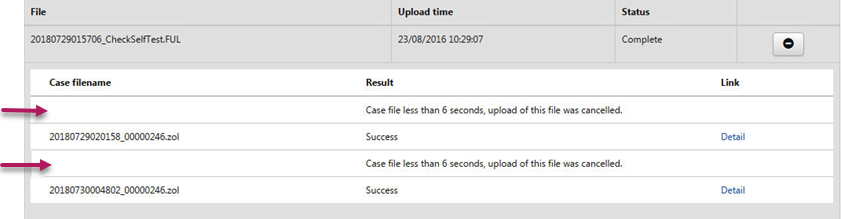
Very short files are ignored and produce a warning message that states that the file is too short and the upload/merge of audio is canceled.

Notes:
-
CaseReview adds CPR and pause periods based on the compression data in the uploaded case.
-
Cases from the defib can be uploaded in a raw format such as .crd, .ful, .xml, and .jason. Multiple attempts at uploading the same file (with the same format) will be considered a duplicate and will be disallowed.
-
Cases uploaded in a .zol format can be uploaded multiple times. Each time you upload the .zol case, it will overwrite the existing case in CaseReview.